Adding Sound to Your Android Apps and Games (Part 2 of the 2012 Android Apps Refresh)
This is the second in an article series about Android development, open source software, audio production, and so much more. You can read part 1 here.
Preface – A New Game!
Using the Hardware at Hand
Capture List, Gotta Capt’ em All!
Fun with Audio Capture
Editing your Audio – Audacity
Removing Ambient Noise with Audacity
Recording a Title Theme with Audacity
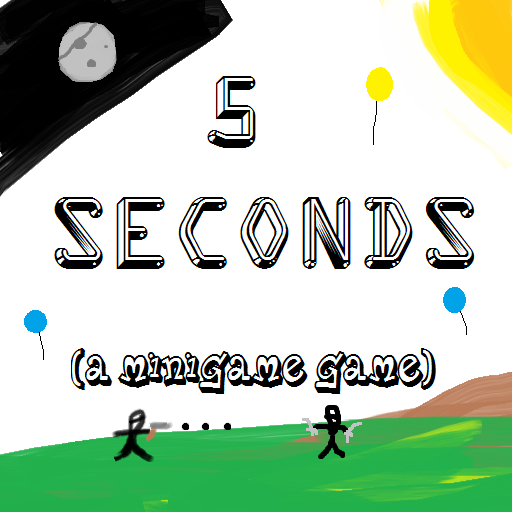
When I wrote the first article in this series, I never thought It would take me where it has. I’ve been all over town recording audio samples on my little boom mic, learned quite a bit about basic audio and recording techniques, and received a ton of excellent feedback from friends and strangers alike. My original intention was simply to update all of my previous Android apps to use my new audio library, but the sparks of creativity cannot be contained. I am therefore starting work on a new minigame collection titled ‘5 seconds’. It will; of course, be fully open source. Expect cameos from all of my previous game characters and a good dose of fun. You can also expect site updates describing the game development process and how ‘5 Seconds’ is evolving. You can checkout the GitHub page for it here.
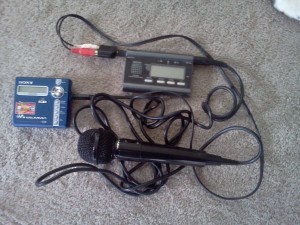
Having tried to record some audio clips with my low-end android phone, I became convinced that this was not the way to move forward. Digging through my parts box, I found a (now obsolete) Sony Minidisc recorder and a Memorex 1/4″ high impedance microphone. I used an old Seiko in-line guitar tuner and some RCA patch cables to bring the Microphone line to the 3.5mm input on the Minidisc recorder. Not the prettiest setup, but it gave me ~10 feet of line to work with, certainly enough for a boom pole. Unfortunately I wasn’t bringing the level up enough, and the recording level was too low.
Next I tried using a standard computer headset. This worked well in that the level was much improved, but the mic had terrible range. I finally settled on a ‘TV microphone’ from my ’80’s junk’ box. The audio was coming in at an appropriate level and I had plenty of 3.5mm extension cables to work with. My portable mic setup was ready to go.
Capture List, Gotta Capt’ em All!
Each of the games I’m updating for this article (see list below) have their own sound effects requirements. Luckily, there are a number of similar elements and themes running through my games that lend themselves to audio re-use. A bullet is a bullet, lightning sounds like lightning, etc. Knowing in advance what types of sounds I’m trying to capture helps dramatically with the process. So, as usual, I compiled a set of lists and looked for duplicates (in bold).
Custom Action Tap
- Menu Checkbox Noise
- Tap
- Kill
- Miss
- Bomb
- Lightning
- Death
- Gain a Life
- Game Over
- Armageddon
- Fire Crackle
- Fire Spread
- Fire Dies
- Freeze Bomb
- Baloon Pop
- Hammer of Thor Appears
- Hammer Kill
Custom Comets
- Menu Checkbox Noise
- Tap
- Kill
- Miss
- Bullet
- Lose a Life
- Reverse Fire Mode
- Enemy Split
- Game Over
Custom Onslaught
- Menu Checkbox Noise
- Tap
- Kill
- Miss
- Bullet
- Lose a Life
- Reverse Fire Mode
- Enemy Split
- Level Up
- Game Over
- Weapon Upgrade
- Double Bullet
- Triple Bullet
- Shotgun
- Boomstick
Custom Pong (Not on market due to Atari Pong Copyright Takedown)
- Menu Checkbox Noise
- Game Over
- Ping
- Pong
Skillful Dodge
- Menu Checkbox Noise
- Game Over
- Walkin Around
- Hit a Tree
Skillful Lines
- Menu Checkbox Noise
- Game Over
- ScreenShot
- Save Score
Skillful Surround
- Menu Checkbox Noise
- Game Over
- ScreenShot
- Save Score
- Doodle Noise
The Grind
- Menu Checkbox Noise
- Level Up
- Grinding Wheel
- Enemy Attacks
- Player Attacks
- Enemy Spell
- Player Spell
- Auto-Grind
- Enemy Drops loot
- Player Learns Spell
- New SubQuest
- New Quest
- Resting Up
- Player Healing
- Enemy Healing
- Weapon Up
- Armor Up
- Helmet Up
- One Year Older
- Stats Up
As you can see, there are a number of duplicate needs that can be served by a single sound file in the library. Please note, I am saying library in the ‘GitHub project’ sense. All of the sound files will not be included in all of the projects themselves or in the android library because that’s just inefficient and causes the library size to grow all sorts of huge.
The final list of sounds to capture for this first iteration of the library ended up being the below 53 sounds.
- Menu Checkbox Noise
- Tap
- Kill
- Miss
- Bomb
- Lightning
- Death
- Gain a Life
- Game Over
- Bullet
- Lose a Life
- Reverse Fire Mode
- Enemy Split
- Level Up
- Game Over
- ScreenShot
- Save Score
- Armageddon
- Doodle Noise
- Weapon Upgrade
- Double Bullet
- Triple Bullet
- Shotgun
- Boomstick
- Fire Crackle
- Fire Spread
- Fire Dies
- Freeze Bomb
- Baloon Pop
- Hammer of Thor Appears
- Hammer Kill
- Ping
- Pong
- Walkin Around
- Hit a Tree
- Grinding Wheel
- Enemy Attacks
- Player Attacks
- Enemy Spell
- Player Spell
- Auto-Grind
- Enemy Drops loot
- Player Learns Spell
- New SubQuest
- New Quest
- Resting Up
- Player Healing
- Enemy Healing
- Weapon Up
- Armor Up
- Helmet Up
- One Year Older
- Stats Up
Now that I had a portable audio recording system set up that could produce decent results (with a far greater range than my cell-phone microphone), it was time to go out into the world and record some audio. An excellent reason to take an impromptu camping trip! I took my recording setup and list of sounds to capture out into the world. Anything that I didn’t feel had an appropriate sound in nature simply would get recorded as a voice-over (i.e. COMBO!) when I returned home from the trip.
When it comes to editing audio, there are few tools as powerful or as deceptively simple as Audacity. I prefer to use it over proprietary software for a number of reasons.
- It doesn’t watermark your audio clips.
- It’s open source, so no limitations of clip size etc
- Being open source, I can talk about it pedagogically without worry of corporate bias
- It’s dead simple to use, and there are some great plugins that come with it
For these and many other reasons, I’ll be referring to Audacity many times throughout this article series. It allows for effortless one-click line-in recording (if you’ve got the ports). This is exactly how I ended up importing the audio samples from my mini disk player. “Why didn’t I transfer them directly as digital files?”, one would naturally ask. “Sony.”, would be my reply. Their anti-consumer efforts did not begin with the Playstation 3, nor do they only extend do their gaming division. While you can transfer audio from your PC and record audio (even optically!) on mini disc players, you cannot transfer the files back to your PC. Seriously. You have to use a line-in cable. Next time I should just go with a reel-to-reel setup and save myself some hassle! Ha!
Removing Ambient Noise with Audacity
One of the best plugins that ships with Audacity is the noise removal plugin from Dominic Mazzoni. It’s dead simple to use, and does a very excellent job of removing background and mechanical noise from your audio clips. I’ve uploaded some small clips as mp3s to demonstrate the profound difference in quality between the original and the post-processed version. Here is the original clip, and hereis the post-processed clip. Note the hissing and light background noise has been virtually eliminated from the source audio. It’s actually quite an easy process.
- First, open up your audio clip in Audacity.
- Select a small chunk of your audio clip that is only background noise.
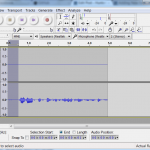
- Next, select Effects->Noise Removal.
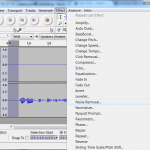
- From within the Noise Removal Pane, select “Get Noise Profile”.
- Hit Ctrl-A to select the entire clip.
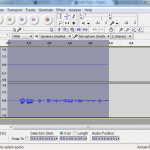
- Again, select Effects->Noise Removal
- Click ‘OK’. That’s all.
Recording a Title Theme with Audacity
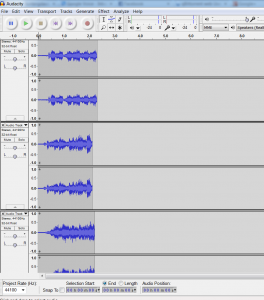
Audacity is also a great tool for recording simple multi-track loops and vocals. As long as you’ve got a mic plugged in and selected in the preferences, recording your theme song is as easy as pie.
-
Record a small vocal. For my upcoming game ‘5 seconds’ I recorded ‘hurry hurry’

- Record the same vocal again, in a slightly different pitch
- Repeat a few times
- That’s that!
Stay tuned for more updates and sneak peeks at my newest game ‘5 Seconds’.
