RetroFW USB Networking and Multiplayer Duke Nukem
While I was in the process of porting Johnny Castaway over to RetroFW devices, I got to know a bit more about the firmware, and these devices. I realized it would be possible to bridge the static usb debugging networks generated by each device. I show here that even a Raspberry Pi Zero is more than capable of acting as a bridge host for multiple systems.
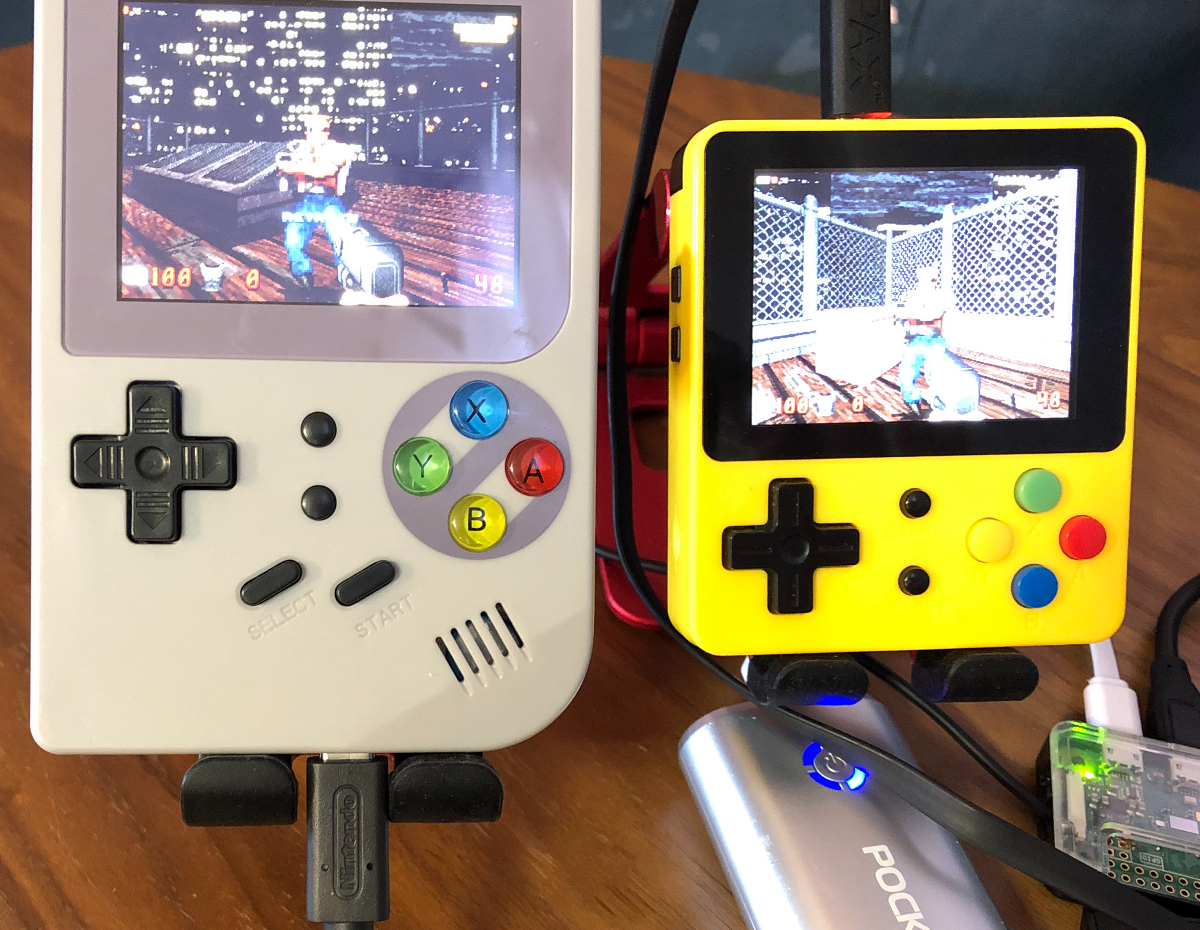
As this is a full networking solution, this opens the door to netplay for any emulator or application which supports ip networking. Yes, multiplayer SNES, GB/GBC/GBA link cable emulation, Doom, cross-platform networking and more are all achievable now. You can also watch a quick co-op game of Duke Nukem between an RG300 and an LDK game system over at my YouTube channel
First, a little backstory. I love Johnny Castaway. For the past 33 years I’ve found a way to get it running on every system within arms reach. Lately that’s meant porting the c version to various game consoles. Last week, that meant RetroFW devices like the LDK Game, RG3xx, and RS-97 series of handhelds and arcade machines. I was having some trouble getting it running, and I had tried everything to capture the error logs. I had tried graphical pop-ups, file output, nothing worked. I was getting frustrated, and I began to go through the RetroFW Source Code and documentation.
When I read that there was a hidden debugging network created when you plug the device into a host, I knew my troubles were over. I could telnet straight in, execute my binary, and figure out the problem. The problem, by the way, was that these devices don’t ship with an SDL2 library built-in. They do for SDL1 though, and I had already backported Johnny to SDL1.2, so that wasn’t a big deal. After that, it was smooth sailing.
Anyway, fast forward a week and I’ve been thinking about that debugging network all week. Even though these devices don’t support mounting other devices in host mode, they do present a virtual USB ethernet network in client mode. A Raspberry pi zero costs 5-10$, that’s a reasonable cost for a bridge device, barely more than the cost of a USB cable. I set about to see if it were possible, and it turns out it’s ridiculously easy. Read on as I detail the four files you can edit to enable USB networking (and thus, multiplayer) on any RetroFW device.
Here’s the gist of it.
- Step 1: Edit the network settings and launch link for RetroFW Device 1
- Step 2: Edit the network settings and launch link for RetroFW Device 2
- Step 3: Enable ipv4 forwarding on your bridge device
- Step 4: Plug it all it, power it all on, and launch
- Success!
First, we’ll edit the default network on the RetroFW device we want to be the ‘server’ for our Duke Nukem multiplayer lan party!
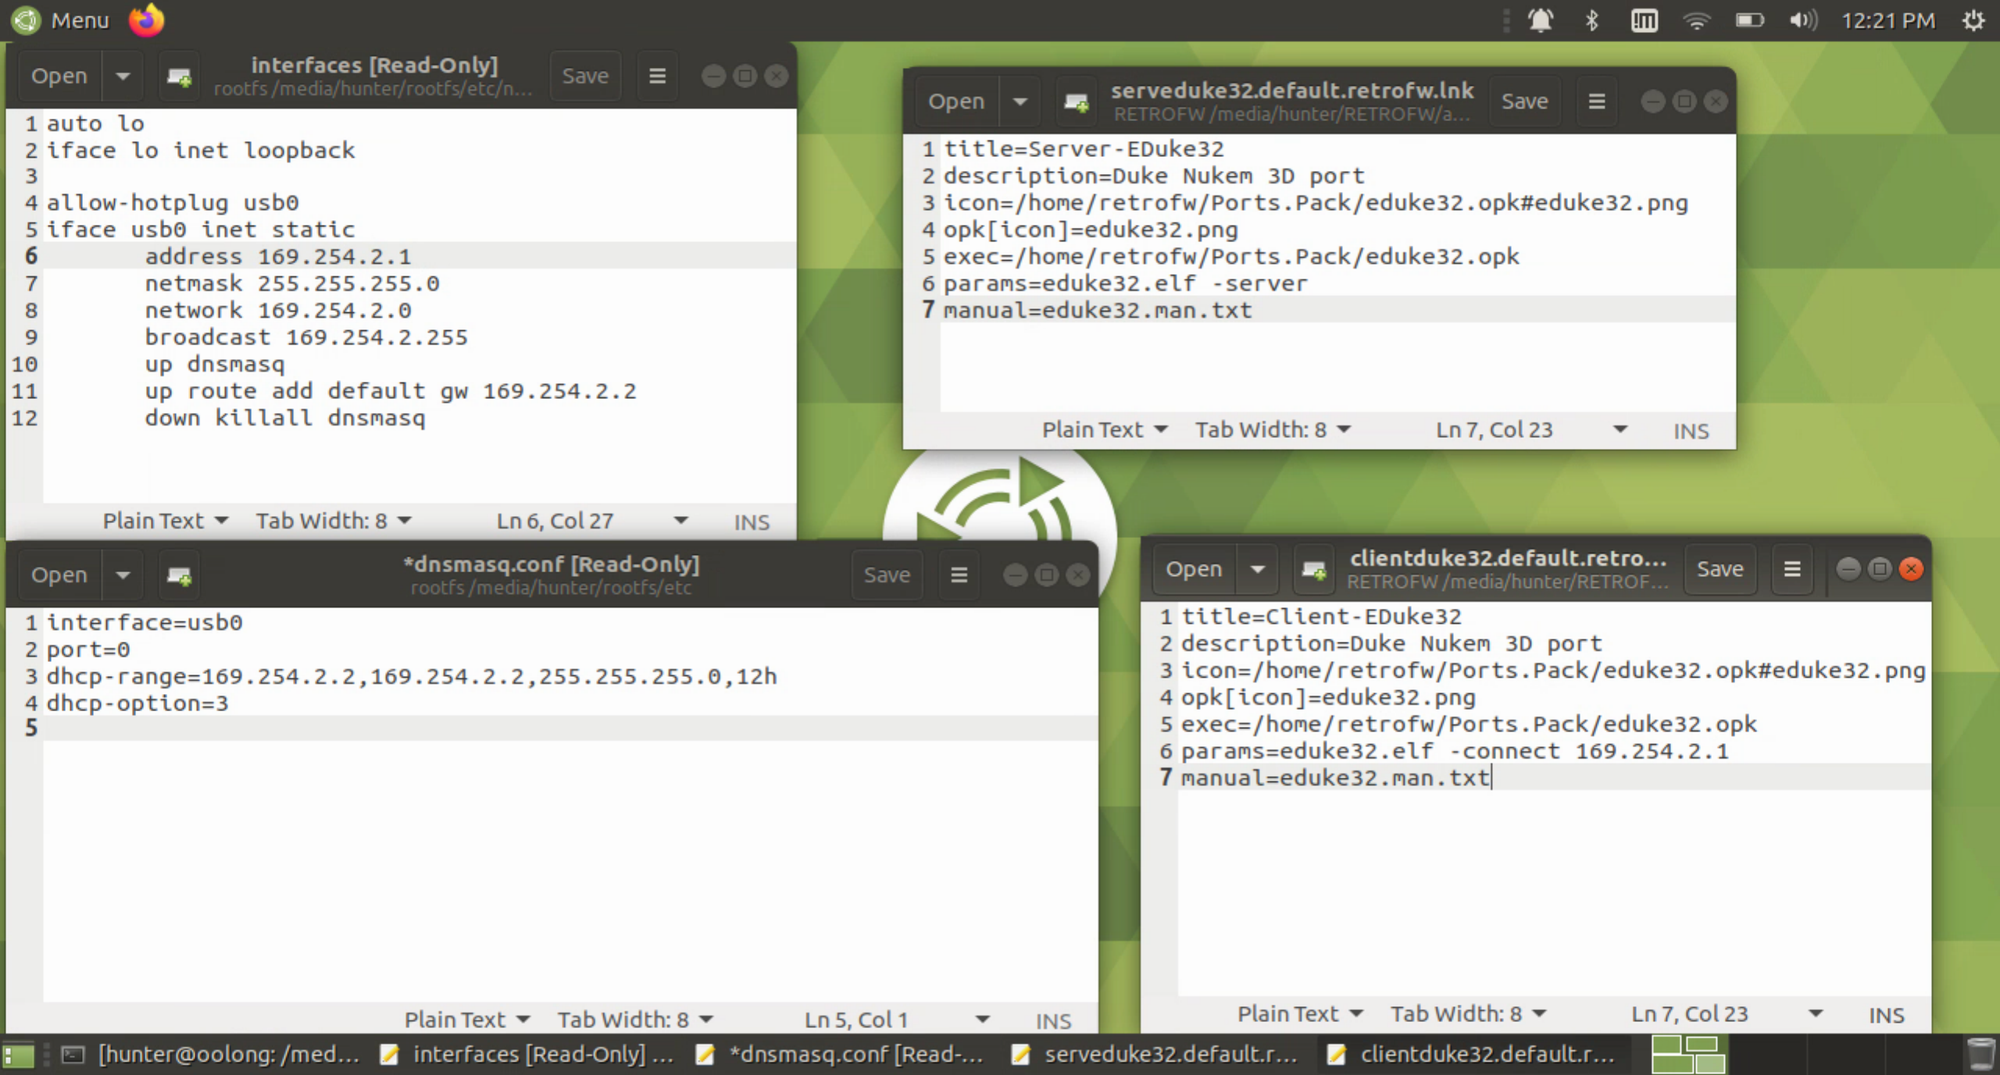
Mount the filesystem of your first RetroFW device, in this case an RG300, and edit ‘/etc/networking/interfaces’ You’re going to want to change the subnet address from 169.254.1.1 to 169.254.2.1. Your interfaces file will look like
auto lo iface lo inet loopback allow-hotplug usb0 iface usb0 inet static address 169.254.2.1 netmask 255.255.255.0 network 169.254.2.0 broadcast 169.254.2.255 up dnsmasq up route add default gw 169.254.2.2 down killall dnsmasq Next, update your ‘/etc/dnsmasq.conf’ file to match, like so:
interface=usb0 port=0 dhcp-range=169.254.2.2,169.254.2.2,255.255.255.0,12h dhcp-option=3 Next, let’s create a launch link for our duke nukem server launch. (make sure you’ve installed the RetroFW version of duke nukem 3d, most come with it installed by default.) Here’s what my ‘/RETROFW/apps/gmenu2x/sections/games/serverduke32.default.retrofw.lnk’ looks like:
title=Server-EDuke32 description=Duke Nukem 3D port icon=/home/retrofw/Ports.Pack/eduke32.opk#eduke32.png opk[icon]=eduke32.png exec=/home/retrofw/Ports.Pack/eduke32.opk params=eduke32.elf -server manual=eduke32.man.txt Next, we’ll edit the default network on the RetroFW device we want to be the ‘client’ joining our Duke Nukem multiplayer lan party!!
Mount the filesystem of your second RetroFW device, in this case my trusty LDK game, and edit ‘/etc/networking/interfaces’ You’re going to want to change the subnet address from 169.254.1.1 to 169.254.3.1. Your interfaces file will look like
auto lo iface lo inet loopback allow-hotplug usb0 iface usb0 inet static address 169.254.3.1 netmask 255.255.255.0 network 169.254.3.0 broadcast 169.254.3.255 up dnsmasq up route add default gw 169.254.3.2 down killall dnsmasq Next, update your ‘/etc/dnsmasq.conf’ file to match, like so:
interface=usb0 port=0 dhcp-range=169.254.3.2,169.254.3.2,255.255.255.0,12h dhcp-option=3 Next, let’s create a launch link for our duke nukem client launch. Here’s what my ‘/RETROFW/apps/gmenu2x/sections/games/clientduke32.default.retrofw.lnk’ looks like:
title=Client-EDuke32 description=Duke Nukem 3D port icon=/home/retrofw/Ports.Pack/eduke32.opk#eduke32.png opk[icon]=eduke32.png exec=/home/retrofw/Ports.Pack/eduke32.opk params=eduke32.elf -connect 169.254.2.1 manual=eduke32.man.txt Next, we’ll enable ipv4 forwarding on our bridge device. Mount up your bridge device filesystem, in this case our RasPi Zero, and enable ipv4 forward in (at least for debian-esque systems) ‘/etc/sysctl.conf’.
Find the line that looks like:
#net.ipv4.ip_forward=1 and uncomment it to look like:
net.ipv4.ip_forward=1 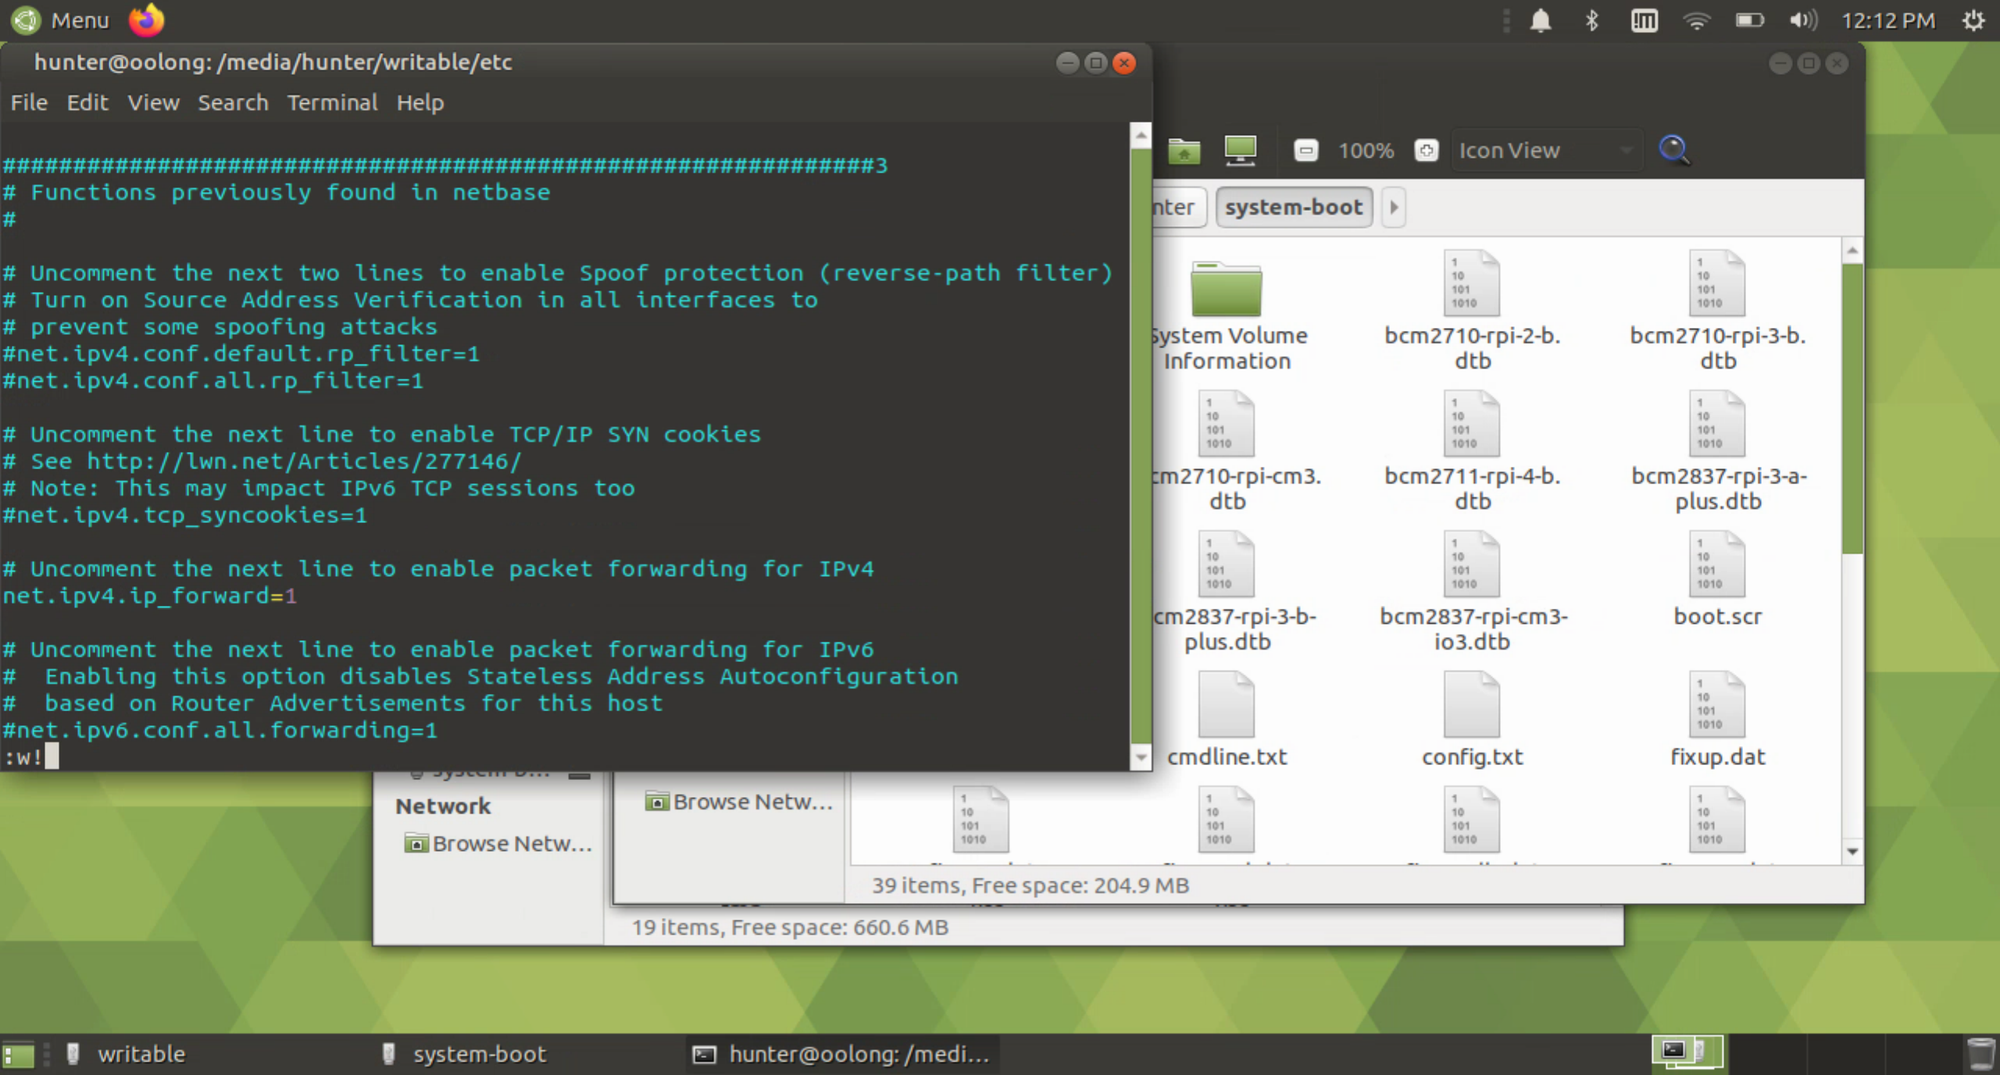
For most systems, that’s enough. For raspbian, it doesn’t include network manager by default. Simply run:
sudo apt install network-manager network-manager-gnome and you’ll be good to plug and play as many devices into your raspberry pi as you like, with no additional configuration.
Here you can see all of the files you need to edit, across all 3 systems in this scenario, in one photo:
Finally, let’s get it all running. I use a cheap microSD card I picked up at MicroCenter, and it’s not particularly fast. In this case it takes a full 2 minutes to boot. Plug the Pi Zero into a power supply, in this case a cheap usb battery pack. I’ve found that even a cheap usb battery pack will keep this raspi bridge running for many, many hours. At any rate, wait a full 2 minutes before you plug in a device.
After your bridge device has booted, plug in your first RetroFW device to the RasPi. When the prompt to ‘mount filesystem’ comes up, hit ‘b’ for ‘charge only’, and after 5 seconds the virtual ethernet port will come up with the static IP that you set for the first device.
Next, plug in your second RetroFW device to the RasPi. When the prompt to ‘mount filesystem’ comes up, hit ‘b’ for ‘charge only’, and after 5 seconds the virtual ethernet port will come up with the static IP that you set for the client.
At this point, provided ipv4 packet forwarding is working properly on your bridge device, your RetroFW devies are fully networked. You know what that means, it’s Duke Nukem 3D time!!
Launch the ‘Server-Duke3d’ link we created above first. Select your server options and launch the game proper.
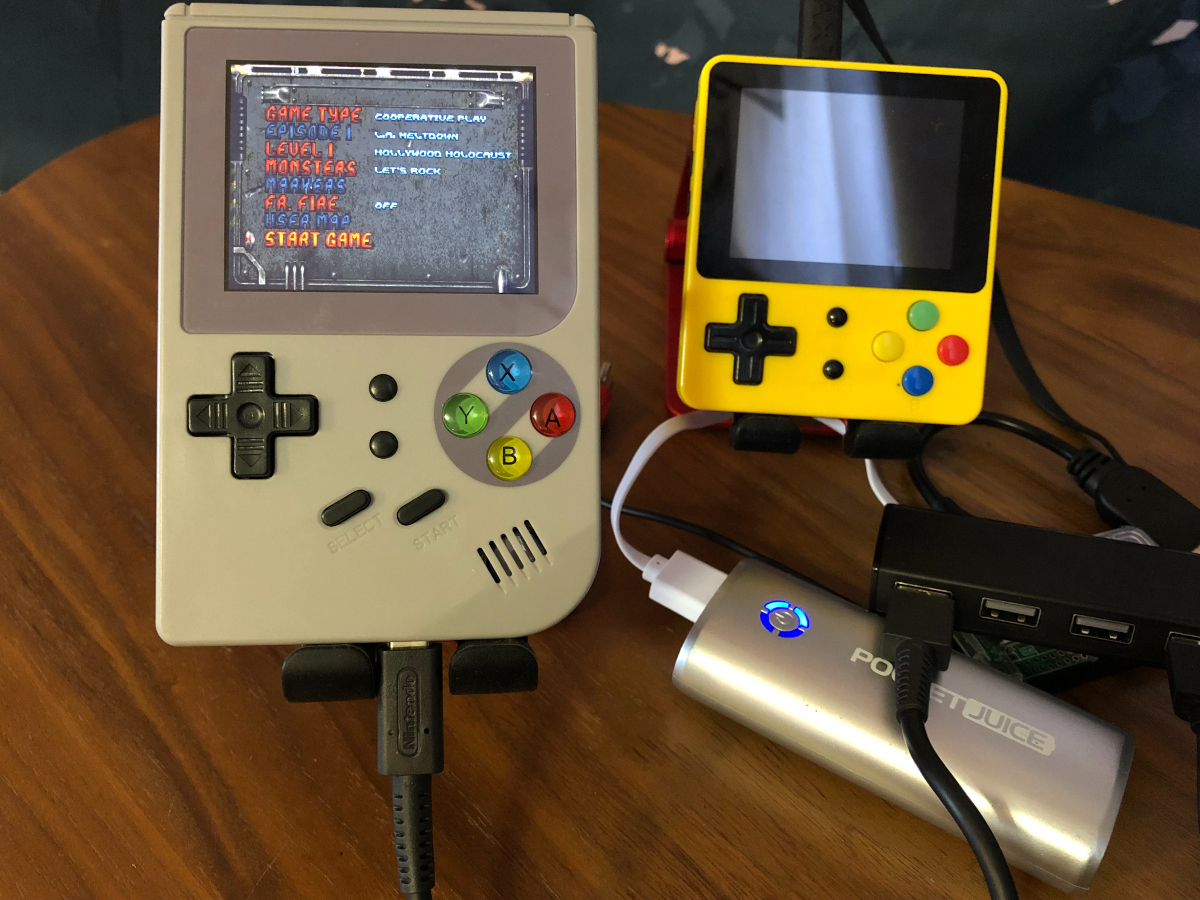
After you’re in, you can launch the client link we created above on any other RetroFW devices we’re networked to. Finally, we’ll power it all on and get to gaming!
And that’s that. I’ve noticed that the RetroFW port of snes9x still has the netplay code compiled in, that’s a logic next target for multiplayer gaming via “link cable.” Stay tuned!